 NFT Collections")

AVAILABLE: 5
Notifications are a great way to engage users, encouraging them to return to your app or pay attention to something while in the app. There are two types of notifications:
- Push Notifications
- Local Notifications
As suggested by the title of this article, we will focus on Local Notifications (since Push Notifications are well-documented). The main difference between them lies in one key point:
- Local Notifications originate from the app itself, whereas Push Notifications are triggered from a remote server.
For the purpose of this article, we will use a vanilla project created when you open a new Flutter app (which has a counter), minus all the counter-related bits.
Setup
To allow our app to use local notifications, we need to add the flutter_local_notifications package to our project. Add the following to your pubspec.yaml file under dependencies:
dependencies:
  flutter:
    sdk: flutter
  flutter_local_notifications: ^5.0.0+1
Then, run the command flutter pub get.
Since the local notification package needs to be initialized, we will create a service class to handle this logic for the entire app. This class will also expose methods for creating/sending/canceling notifications. Create a new Dart file named notification_service.dart with the following code:
import 'package:flutter_local_notifications/flutter_local_notifications.dart';

class NotificationService {
  static final NotificationService _notificationService =
      NotificationService._internal();

  factory NotificationService() {
    return _notificationService;
  }

  NotificationService._internal();
}
The above code is translated into a Singleton object in Dart. Be sure to import the local notifications package at the top of this file.
Integration
Since Flutter is a cross-platform framework, any package built for it needs to support both iOS and Android devices. Since notifications are handled very differently between iOS and Android, some calibration is necessary when using the local notifications package.
First, we need to create an instance for FlutterLocalNotificationsPlugin. We will use this object to initialize settings for Android and iOS, as well as for other notification-related purposes.
final flutterLocalNotificationsPlugin = FlutterLocalNotificationsPlugin();
Now we need to initialize the local notification plugin with specific settings for Android and iOS. To do this, we need to create an InitializationSettings object. It accepts arguments for the following operating systems: Android, iOS, and macOS.
We will not discuss macOS here since it's similar to configuring iOS.
Android
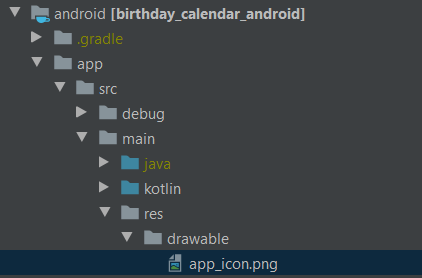
On Android, it's relatively simple as there is only one required argument to pass: defaultIcon (String). This represents the icon to be displayed in the notification. You must provide the name of the icon you want to use. Place this icon inside the drawable directory. The full path is:
YOUR_APPLICATION_NAME/android/app/src/main/res/drawable/YOUR_APP_ICON.png
No permissions are needed.
iOS
Like most things related to iOS, it becomes a bit more complex. Due to the way notifications are handled across different versions of the OS, additional configurations are needed here.
In the AppDelegate file, you need to add the following line of code:
- (BOOL)application:(UIApplication *)application
didFinishLaunchingWithOptions:(NSDictionary<UIApplicationLaunchOptionsKey, id> *)launchOptions {
  if (@available(iOS 10.0, *)) {
    [UNUserNotificationCenter currentNotificationCenter].delegate = (id<UNUserNotificationCenterDelegate>) self;
  }
}
You need to request permission from the user for various notification-related issues. Therefore, the iOS initializer object has the following arguments:
requestAlertPermissionrequestBadgePermissionrequestSoundPermission
Each of them corresponds to a different aspect of the notification. You can also set default values for each of them:
defaultPresentAlertdefaultPresentBadgedefaultPresentSound
These options exist because initializing the local notification plugin may cause the OS to show a permission dialog to the user when you don't want it to appear. If you don't want this behavior, you can set all of these values to false.
Another warning for iOS relates to the behavior difference between notifications shown to users while your app is in the foreground or background. Out of the box, the OS will not show notifications to the user when the app is in the foreground. The plugin will handle the display of notifications when the app is in the foreground, but for iOS 10 and below, there is a need to provide a callback method onDidReceiveLocalNotification to handle user interaction with the notification.
After configuring the platform-specific initialization, it's time to incorporate all this logic into methods in our notification service. The best approach here is to create an init method, which will be called from our main.dart file when the app first launches.
void init() {
  final AndroidInitializationSettings initializationSettingsAndroid =
      AndroidInitializationSettings('app_icon');

  final IOSInitializationSettings initializationSettingsIOS =
      IOSInitializationSettings(
    requestSoundPermission: false,
    requestBadgePermission: false,
    requestAlertPermission: false,
    onDidReceiveLocalNotification: onDidReceiveLocalNotification,
  );

  final InitializationSettings initializationSettings =
      InitializationSettings(
          android: initializationSettingsAndroid,
          iOS: initializationSettingsIOS,
          macOS: null);
}
Note that after creating instances for platform-specific initialization settings, we also need to create an InitializationSettings object, which we pass into the platform-specific initialization settings object.
The final step here is to call the initialization method on the FlutterLocalNotificationsPlugin object.
In addition to the initialization settings mentioned above, it also has another argument called onSelectNotification. This argument represents the callback that will be called after the notification is tapped, and this is an optional argument. This callback has one argument, payload, which will hold any data passed through the notification.
Future<void> init() async {
  final AndroidInitializationSettings initializationSettingsAndroid =
      AndroidInitializationSettings('app_icon');

  final IOSInitializationSettings initializationSettingsIOS =
      IOSInitializationSettings(
    requestSoundPermission: false,
    requestBadgePermission: false,
    requestAlertPermission: false,
    onDidReceiveLocalNotification: onDidReceiveLocalNotification,
  );

  final InitializationSettings initializationSettings =
      InitializationSettings(
          android: initializationSettingsAndroid,
          iOS: initializationSettingsIOS,
          macOS: null);

  await flutterLocalNotificationsPlugin.initialize(initializationSettings,
      onSelectNotification: selectNotification);
}

Future selectNotification(String payload) async {
  // Handle notification tapped logic here
}
In our main.dart file, we will call the init method like this:
Future<void> main() async {
  WidgetsFlutterBinding.ensureInitialized();
  await NotificationService().init(); // <----
  runApp(MyApp());
}
Use Case - Displaying Notifications
To display a notification, you need to create an appropriate notification details instance (Android/iOS). Each platform has its specific arguments that need to be passed.
const AndroidNotificationDetails androidPlatformChannelSpecifics =
    AndroidNotificationDetails(
        channelId: String,   // Required for Android 8.0 or later
        channelName: String, // Required for Android 8.0 or later
        channelDescription: String, // Required for Android 8.0 or later
        importance: Importance,
        priority: Priority
    );
The example above shows just a few arguments you can pass to AndroidNotificationDetails. The list is much longer, and you can check it out here.
const IOSNotificationDetails iOSPlatformChannelSpecifics =
    IOSNotificationDetails(
        presentAlert: bool?,  // Present an alert when the notification is displayed and the application is in the foreground (only from iOS 10 onwards)
        presentBadge: bool?,  // Present the badge number when the notification is displayed and the application is in the foreground (only from iOS 10 onwards)
        presentSound: bool?,  // Play a sound when the notification is displayed and the application is in the foreground (only from iOS 10 onwards)
        sound: String?,  // Specifies the file path to play (only from iOS 10 onwards)
        badgeNumber: int?, // The application's icon badge number
        attachments: List<IOSNotificationAttachment>?,  // (only from iOS 10 onwards)
        subtitle: String?, // Secondary description (only from iOS 10 onwards)
        threadIdentifier: String?  // (only from iOS 10 onwards)
   );
Next, we will create a NotificationDetails object and pass it to our platform-specific notification details object.
const NotificationDetails platformChannelSpecifics =
  NotificationDetails(android: androidPlatformChannelSpecifics);

// OR

const NotificationDetails platformChannelSpecifics =
  NotificationDetails(iOS: iOSPlatformChannelSpecifics);
Then, we need to call the show method from FlutterLocalNotificationsPlugin.
await flutterLocalNotificationsPlugin.show(
    int id,
    String? title,
    String? body,
    NotificationDetails? notificationDetails,
    String? payload);
The parameters here are clearer, but let's break them down:
id- the unique identifier for the notification. Each notification must have a unique ID.title- the title of the notification.body- what we want to display as the main message of the notification.notificationDetails- the notification details object we discussed earlier.payload- data that we want to pass with the notification, to be used later when the notification is